Tag-based deployment for Cloudflare Pages using GitHub Actions
Published on December 17, 2024
Last updated on December 17, 2024 — 14 min read
As a modern front-end developer, I am quite spoiled by the ease of Git integration from Platform-as-a-Service (PaaS) such as Vercel, Netlify, and Cloudflare Pages for deployment. It takes just a few clicks to set up and push changes using Git for continuous deployment. Life has never been easier.
Behind all these conveniences, our needs as developers sometimes cannot be met by the existing PaaS, so additional steps are needed to meet these needs. An example is when you want to deploy only when there is a new tag in your project's remote repository—or other deployment strategies.
In this article, I want to write the deployment steps I did for my project: Kaget (Kawan Budget). This article will use the blog project template from Astro. Simply put, the deployment flow that is carried out will be as follows:
- Every push to the main branch will be treated as a preview/staging deployment with its own URL.
- When a new tag is pushed to the main branch, it will be considered a production deployment with https://kaget.mupin.dev/ as its URL.
I use Cloudflare Pages for hosting, GitHub Actions for CI/CD, and GitHub Releases to manage tags and release notes.
The Problem
Only supports push-to-deploy
By default, Cloudflare Pages, Vercel, and Netlify do not support tag-based deployment out-of-the-box. Therefore, GitHub Actions plays a crucial role here—as well as the support of CLI tools from each platform. Cloudflare has Wrangler as their CLI tool so that developers can interact with Cloudflare services via CLI (command-line interface).
Wrangler takes all the convenience out of Cloudflare Pages
With Wrangler, we get the flexibility to set how our project will be deployed, but the ease of Cloudflare Pages will be gone.
Originally, in Cloudflare Pages, we can easily choose which branch will be used as a production deployment through the dashboard and all other branches will be considered as preview deployments. By default, Cloudflare Pages will do a build and deploy on every push; this allows us to have a unique deployment URL for each commit or branch.
These things should be gone or we can create them manually for the flexibility we want.
What are GitHub Actions?
GitHub Actions is one of GitHub’s features for CI/CD processes—automating application development processes, such as build, test, and deployment.
I use GitHub Actions of course because I put my project repository on GitHub, so all the processes are more seamless—and of course, it’s free!
What are Cloudflare Pages?
Cloudflare Pages is one of Cloudflare’s services for hosting web applications Cloudflare Pages features are very complete:
- Build and deploy automatically
- Unlimited collaboration. Add unlimited team members at no cost
- Integration with Cloudflare Workers for dynamic applications; server-side rendering to server functions
- Integration with free, privacy-first built-in analytics
- Unlimited bandwidth
- Unlimited static requests
Since I also use Cloudflare DNS service, it makes it easier for me when I need a custom domain. In addition, there are many cases of developers whose hobby projects suddenly get a lot of traffic so that they reach/exceed the bandwidth/static request limits set by other providers—that’s why I have Cloudflare Pages ready before the bill comes—eh?
The web analytics provided are also why I tried Cloudflare Pages. Currently, I use self-hosted Umami with Supabase to store my data. This combination worked great for about 6 months; however, one annoying thing is that I need to make sure my Supabase doesn’t go into pause mode. Supabase does this on the free tier after a week of inactivity.
Preparation
Here are some things you need to prepare before reading further:
- GitHub account
- Git installed on your device
- Text editor
- Node.js package manager such as:
npm,yarn, orpnpm - Cloudflare account
Creating a project with Astro
We will use the blog starter template from Astro by running the following command in the terminal:
$ pnpm create astro --template blogFollow the prompts and make sure you select “Yes” for installing dependencies and initializing the Git repository.

Make sure the project is running smoothly in development by running pnpm dev and is also buildable with pnpm build.
Setting up a repository on GitHub
After successfully creating a project with Astro and making sure everything works well, the next step is to create a remote repository on GitHub and bring our blog project there.
- Visit https://github.com/new
- Fill in the repository name only and leave the other fields, then click “Create repository”
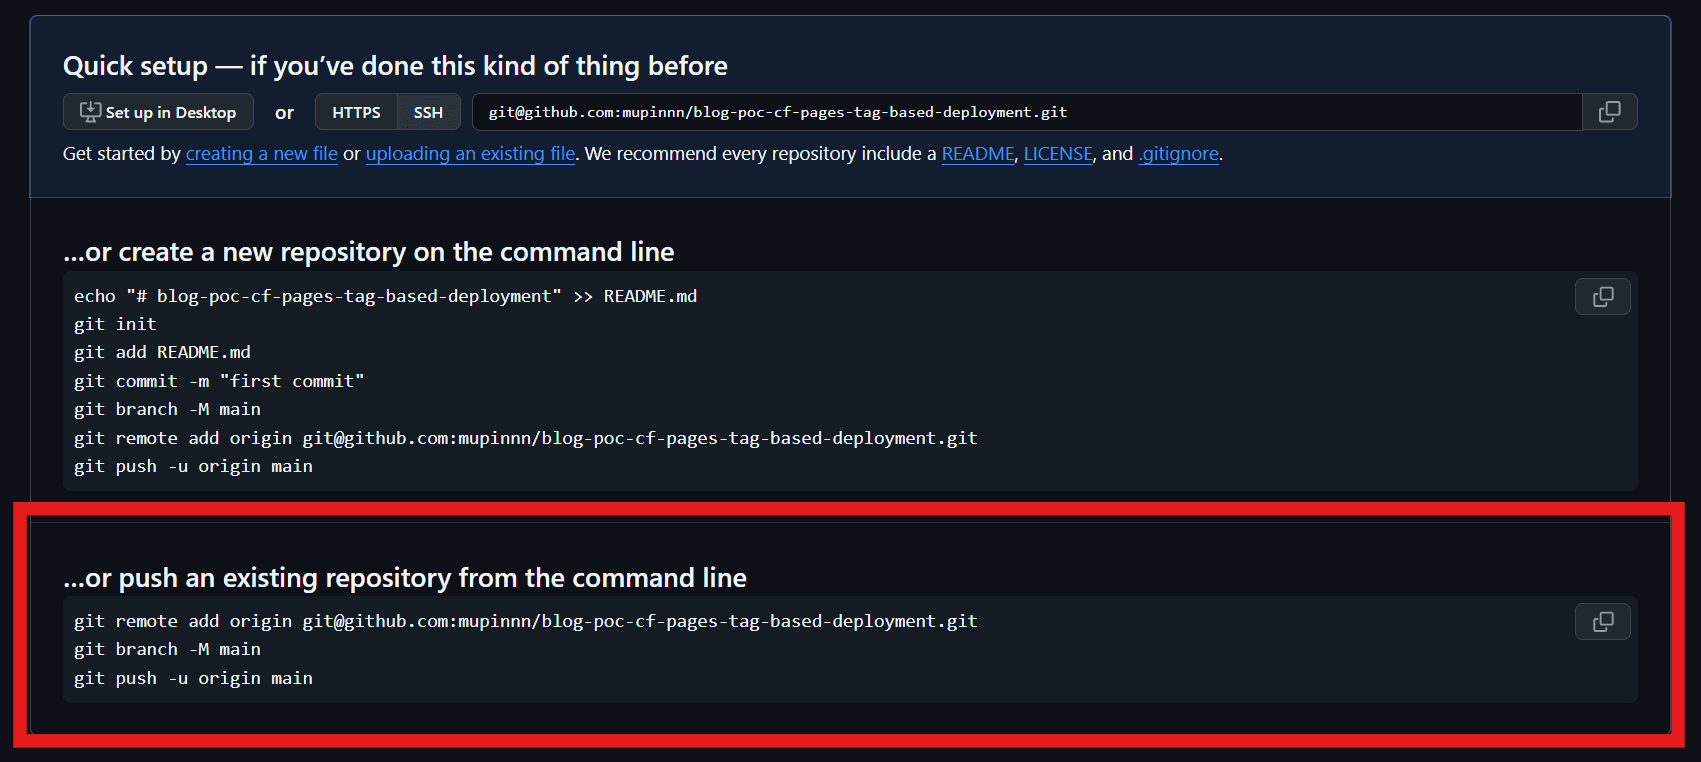
- After the remote repository is created, two guides will appear to push our local repository to the remote repository we just created. Follow the steps in the red box below:
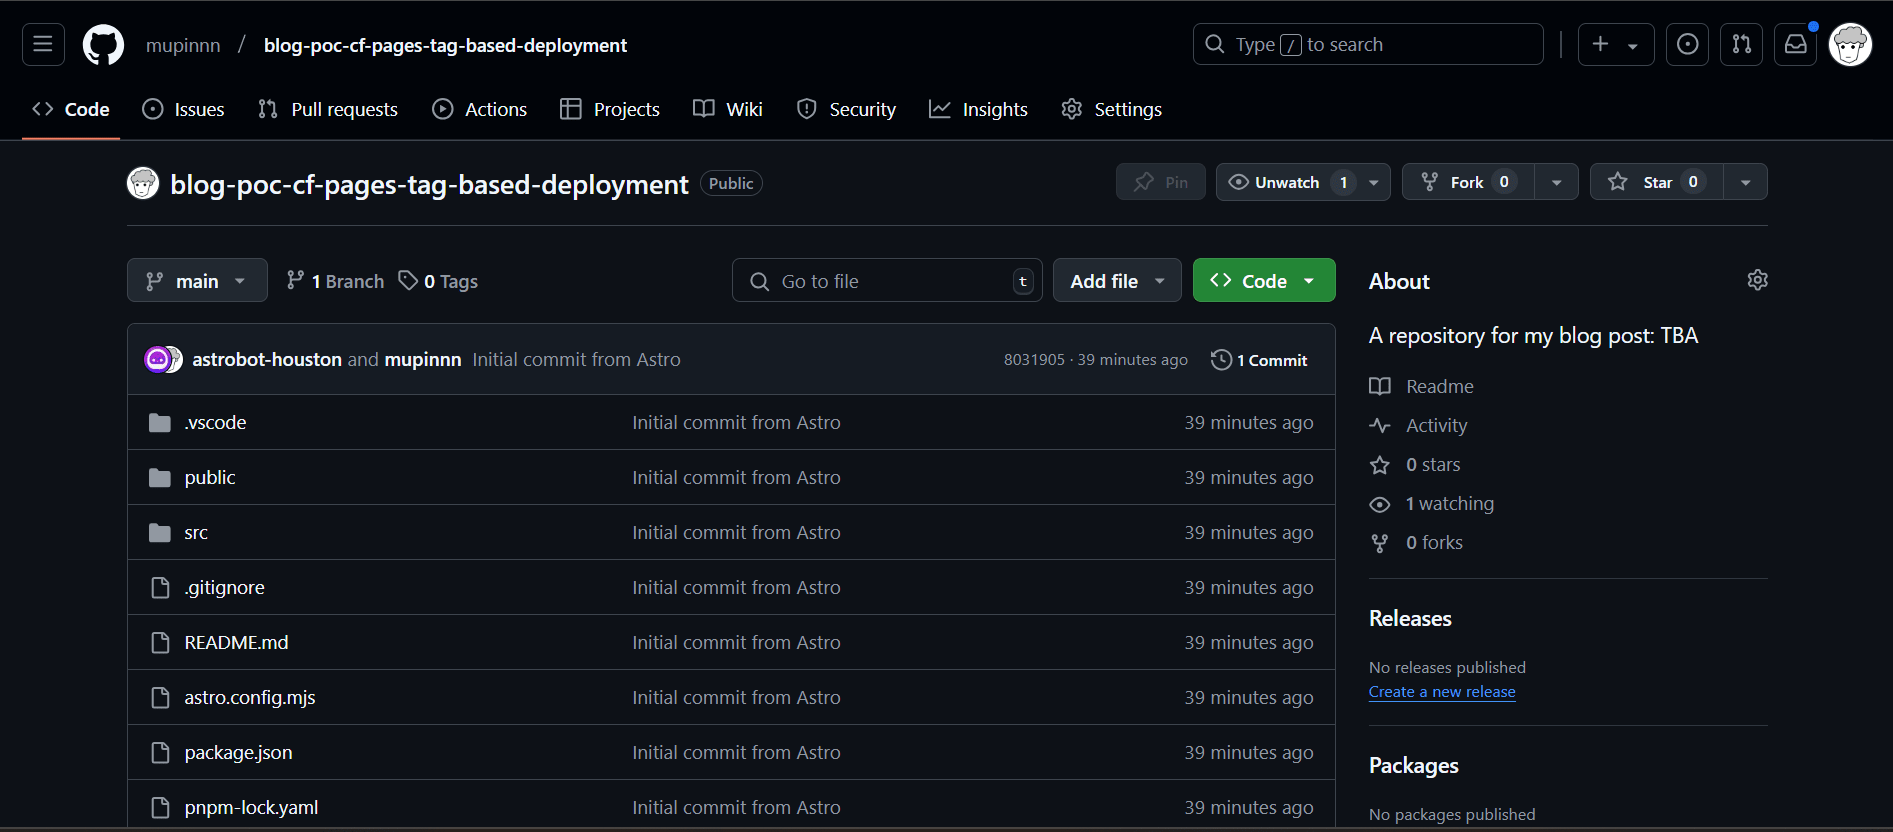
- Reload the page and make sure your remote repository looks something like this:
Get Cloudflare API Token
Before using Wrangler CLI, we need two credentials from Cloudflare; namely API Token and Account ID.
- Log in to the Cloudflare dashboard
- Go to the “My Profile” menu in the upper right corner by clicking the user icon
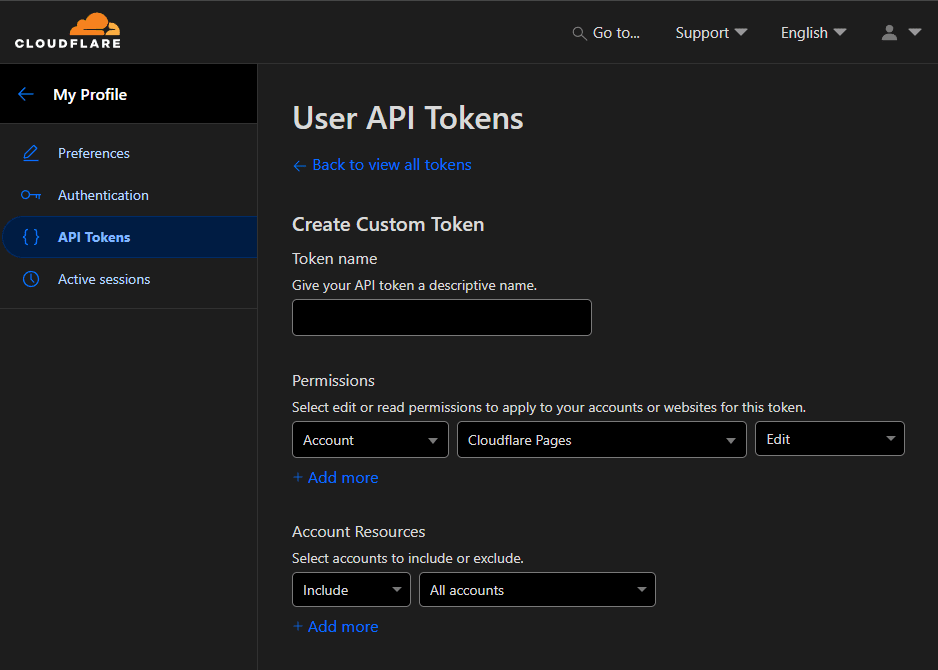
- Go to the “API Tokens” menu, then click “Create Token”
- Select “Custom Token”, then click “Get started”
- Give any name to the API Token to be created in the “Token name” column
- Then, in the “Permissions” section, select Account, Cloudflare Pages, and Edit (select the options in order from left to right)
- Click “Continue to summary”, then click “Create token”
- Copy and save the token for later use in Github Actions and APIs
Get Cloudflare Project Account ID
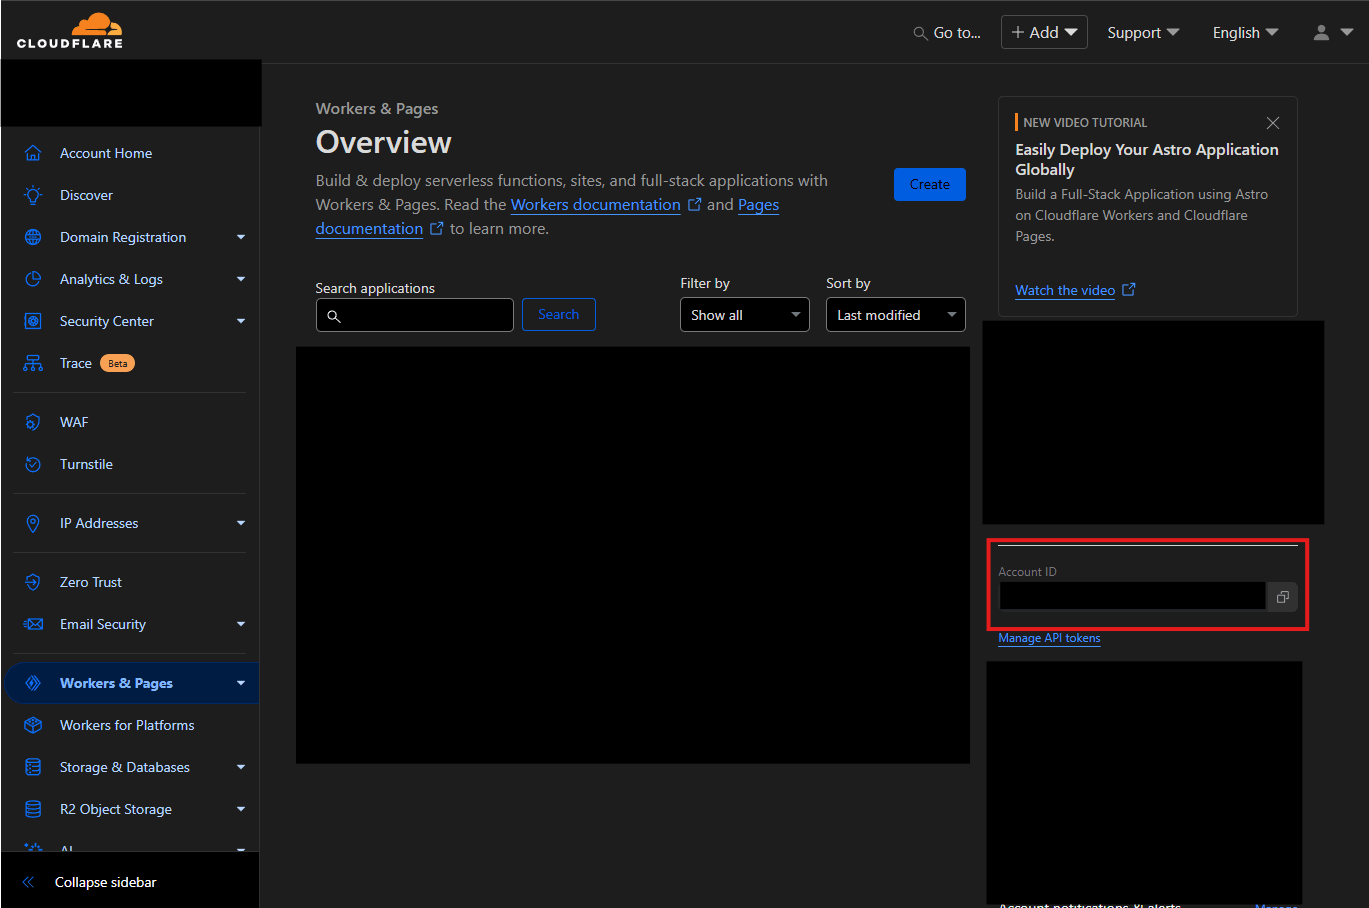
- Log in to the Cloudflare dashboard
- Go to the “Workers & Pages” menu
- There is a “Account Details” section on the right side, there is a “Account ID” column. Click to copy the contents
- Save the Account ID for later use in GitHub Actions and APIs
Creating Github Actions workflows
Workflows are configurable automated processes that will run one or more jobs (hereinafter referred to as jobs). Workflows are defined by YAML files that can be run based on an event, run manually, or even scheduled.
Workflow files are stored in the .github/workflows folder in a repository. Therefore, our first step is to create a
.github/workflows folder in our blog project.
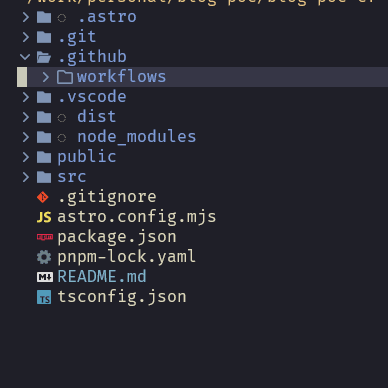
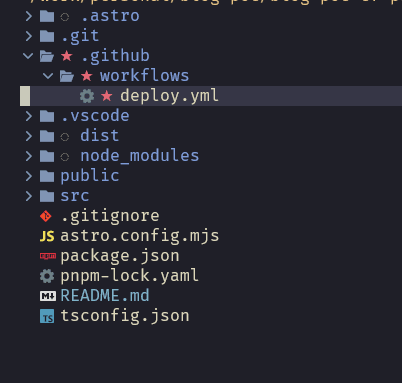
Then, create a deploy.yml file inside the .github/workflows folder.
Defining triggers, permissions, and environment variables
Basically, there are three important components in a workflow: events, jobs, and steps. Events are the determinants of when a workflow will be executed. Jobs are tasks that run on their respective virtual machines that are run in parallel by default. Each job can have several steps that can run a script that we create or a package/action available in the marketplace.

In this project, I want the workflow to be run on:
- Every time there is a push to the main branch
- Every time there is a new release from Github Releases
- Can be run manually by selecting the destination environment of the deployment as desired. The options are staging and production
name: Deploy to Cloduflare Pages

on:
  workflow_dispatch:
    inputs:
      environment:
        description: "Choose an environment to deploy to:"
        required: true
        default: "staging"
        type: choice
        options:
          - staging
          - production
  push:
    branches:
      - main
  release:
    types: [released]
First, the name. Like a prayer, name your workflow as well as possible. In the name key, you can give a name to the workflow that will be created.
name: Deploy to Cloudflare PagesSecond, events. Events are defined inside the on key.
on:
  event_name:
  event_name_2:
  event_name_n:
To run a workflow manually, we can use the workflow_dispatch event. This event accepts a maximum of 10 inputs. Inputs
function as option columns that we can choose to influence the running of a workflow. There are various data types to
define an input, such as boolean, choice, number, environment, and string. Further explanation can be read at
Workflow syntax for GitHub Actions
As an example:
on:
  workflow_dispatch:
    inputs:
      logLevel:
        description: "Log level"
        required: true
        default: "warning"
        type: choice
        options:
          - info
          - warning
          - debug
      tags:
        description: "Test scenario tags"
        required: false
        type: boolean
      environment:
        description: "Environment to run tests against"
        type: environment
        required: true
The above configuration will product inputs as below.
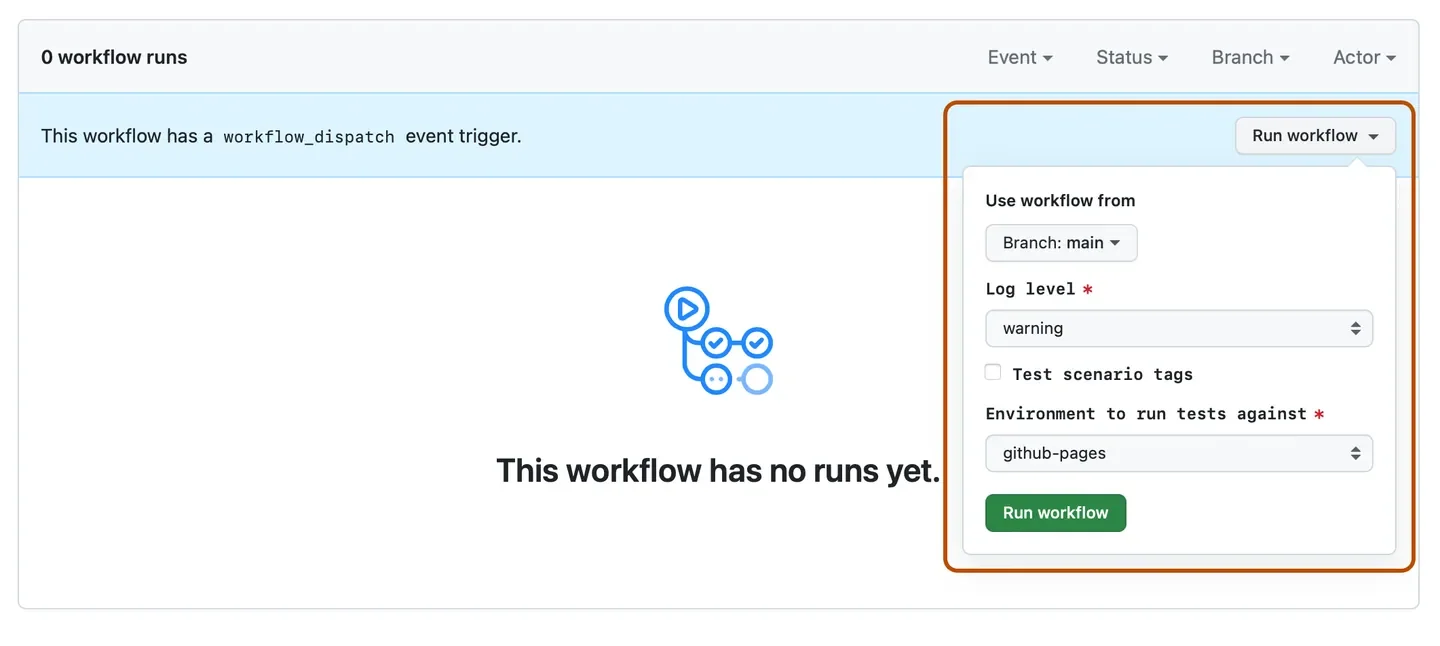
Okey, back to the main topic. With the configuration that we have made above, the inputs produced will be like this
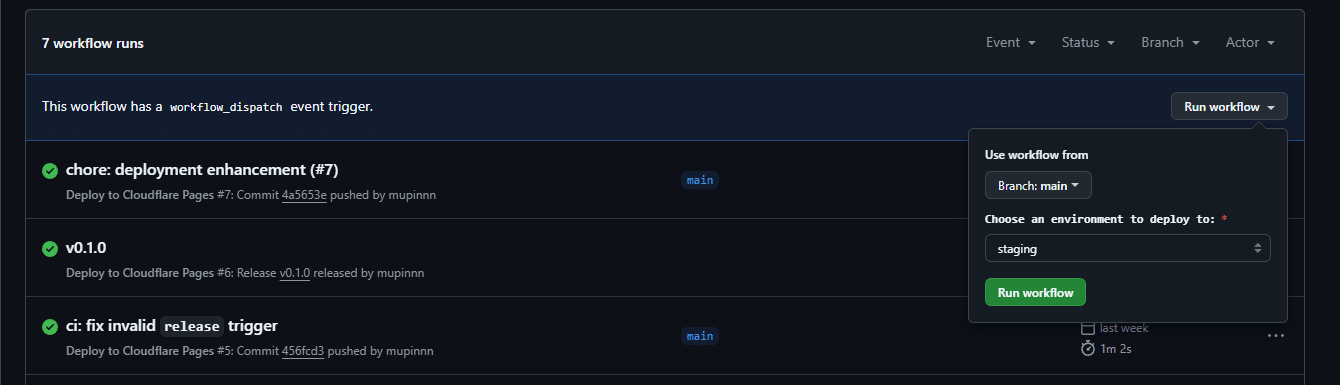
on:
  workflow_dispatch:
    inputs:
      environment:
        description: "Choose an environment to deploy to:"
        required: true
        default: "staging"
        type: choice
        options:
          - staging
          - production
Next, we need to define a push event to execute this workflow when there is a push to the main branch.
on:
  workflow_dispatch:
    inputs:
      environment:
        description: "Choose an environment to deploy to:"
        required: true
        default: "staging"
        type: choice
        options:
          - staging
          - production
  push:
    branches:
      - main
In addition to branches, there are also tags and paths. So, why don’t we use tags here too? Because events in
GitHub Actions are like logical OR. If we define an event like this:
on:
	push:
		branches:
			- main
		tags:
			- 'v**'
So, the workflow will be run when there is a push to the main branch OR a push tag with the prefix “v”. It takes a
little acrobatics if you want a workflow to run when there is a push tag to the main branch. Therefore, we will only use
the release event which I will explain next.
Next, run the workflow when a new release with a tag is created from GitHub Releases. The release event has at least
seven types, namely:
publishedunpublishedcreatedediteddeletedprereleasedreleased
Each has its own use and the one we will use is only released. We don’t need draft and pre-release yet, so we
don’t need the published type. Further explanation can be read at
Events that trigger workflows

name: Deploy to Cloudflare Pages

on:
  workflow_dispatch:
    inputs:
      environment:
        description: "Choose an environment to deploy to:"
        required: true
        default: "staging"
        type: choice
        options:
          - staging
          - production
  push:
    branches:
      - main
  release:
    types: [released]
After the event is done, we need to define permissions so that our workflow can run smoothly and use what we need. In
this workflow, we only need two permissions: contents and deployments. You can see what permissions are available at
Workflow permissions
permissions:
  contents: read
  deployments: write
Next, we need an environment variable to determine whether the workflow is currently running for production or staging. We will use the environment variable in the last step, which is deployment to Cloudflare Pages.
env:
  IS_PRODUCTION: ${{ github.event.inputs.environment == 'production' || github.event_name == 'release' }}
IS_PRODUCTION will be true if the workflow is manually run with the production option or the workflow is run
because it was triggered by a release event. For our main purpose, the difference between staging and production is the
tag or release.
So far, our deploy.yml file will look like this:
name: Deploy to Cloudflare Pages

on:
  workflow_dispatch:
    inputs:
      environment:
        description: "Choose an environment to deploy to:"
        required: true
        default: "staging"
        type: choice
        options:
          - staging
          - production
  push:
    branches:
      - main
  release:
    types: [released]

permissions:
  contents: read
  deployments: write

env:
  IS_PRODUCTION: ${{ github.event.inputs.environment == 'production' || github.event_name == 'release' }}
Fasten your seat belts, because we’re about to dive into the ocean of jobs!
Defining jobs
Jobs in GitHub Actions run in parallel by default. However, we can define them to run sequentially with the key
jobs.<job_id>.needs. In this workflow, we will define two jobs: build and deploy.
jobs:
	build:
		runs-on: ubuntu-latest
		steps:
		 - . . .

	deploy:
		needs: build
		runs-on: ubuntu-latest
		steps:
			- . . .
The runs-on key is needed to define where the job we create will be run. ubuntu-latest means the job will be run on
a virtual machine with the latest version of Ubuntu Linux OS. There are many other runner options that you can see at
Workflow runners.
Then, there is the needs key which means the job needs to wait for the build job to complete before running.
Actually, we can just create one job—but that is not recommended, especially since we need to install dependencies and
build before doing the deployment; if the deployment fails, we need to repeat the entire job from the beginning. Unlike
separating the build and deploy jobs, when deploy fails, we can just rerun the deploy job.
For the build job, we need a few steps:
- Use the
actions/checkout@v4action to check out our repository so that our workflow can access the code - Since I am using
pnpm, I need to use thepnpm/action-setup@v4action to installpnpm - To use the
pnpmcache feature, we need to follow these stepspnpm/action-setupdocumentation - The next step is to run the build with
run: pnpm build - Once the build is complete, we need to upload the build file to
artifacts
so that the file can be used by the next job or even another workflow. For this, we use
actions/upload-artifact@v4
jobs:
  build:
    runs-on: ubuntu-latest
    steps:
      - uses: actions/checkout@v4

      - uses: pnpm/action-setup@v4
        with:
          version: 8
          run_install: false

      - uses: actions/setup-node@v4
        with:
          node-version: 20
          cache: "pnpm"

      - name: Install dependencies
        run: pnpm install

      - name: Build
        run: pnpm build

      - name: Upload artifacts
        uses: actions/upload-artifact@v4
        with:
          name: build-files
          path: ./dist
For npm users, you don't need pnpm/action-setup@v4 and just need to change a few commands.
jobs:
  build:
    runs-on: ubuntu-latest
    steps:
      - uses: actions/checkout@v4

      - uses: actions/setup-node@v4
        with:
          node-version: 20

      - name: Install dependencies
        run: npm install

      - name: Build
        run: npm run build

      - name: Upload artifacts
        uses: actions/upload-artifact@v4
        with:
          name: build-files
          path: ./dist
For yarn users, you can try to adjust with the following action
GitHub Action for Yarn
Next, for the deploy job! The steps we need are:
- Download the artifacts that we uploaded in the previous job using the
actions/download-artifact@v4action - Since each job runs on an independent machine, we need to install
pnpmagain using thepnpm/action-setup@v4action - Finally, we will use the
cloudflare/wrangler-action@v3action to do the deployment to Cloudflare Pages.
deploy:
  needs: build
  runs-on: ubuntu-latest
  steps:
    - name: Download artifacts
      uses: actions/download-artifact@v4
      with:
        name: build-files
        path: ./dist

    - uses: pnpm/action-setup@v4
      with:
        version: 8

    - name: Deploy to Cloudflare Pages
      uses: cloudflare/wrangler-action@v3
      with:
        apiToken: ${{ secrets.CLOUDFLARE_API_TOKEN }}
        accountId: ${{ secrets.CLOUDFLARE_ACCOUNT_ID }}
        gitHubToken: ${{ secrets.GITHUB_TOKEN }}
        packageManager: pnpm
        command: |
          pages deploy dist --project-name=kaget --branch=${{ env.IS_PRODUCTION == 'true' && 'production' || 'main' }}
Remember the API Token and Account ID that we prepared at the beginning of this article? Well, these two things are
needed in this step to use Wrangler CLI via cloudflare/wrangler-action@v3 action.
We will add the API Token and Account ID to GitHub Secrets.
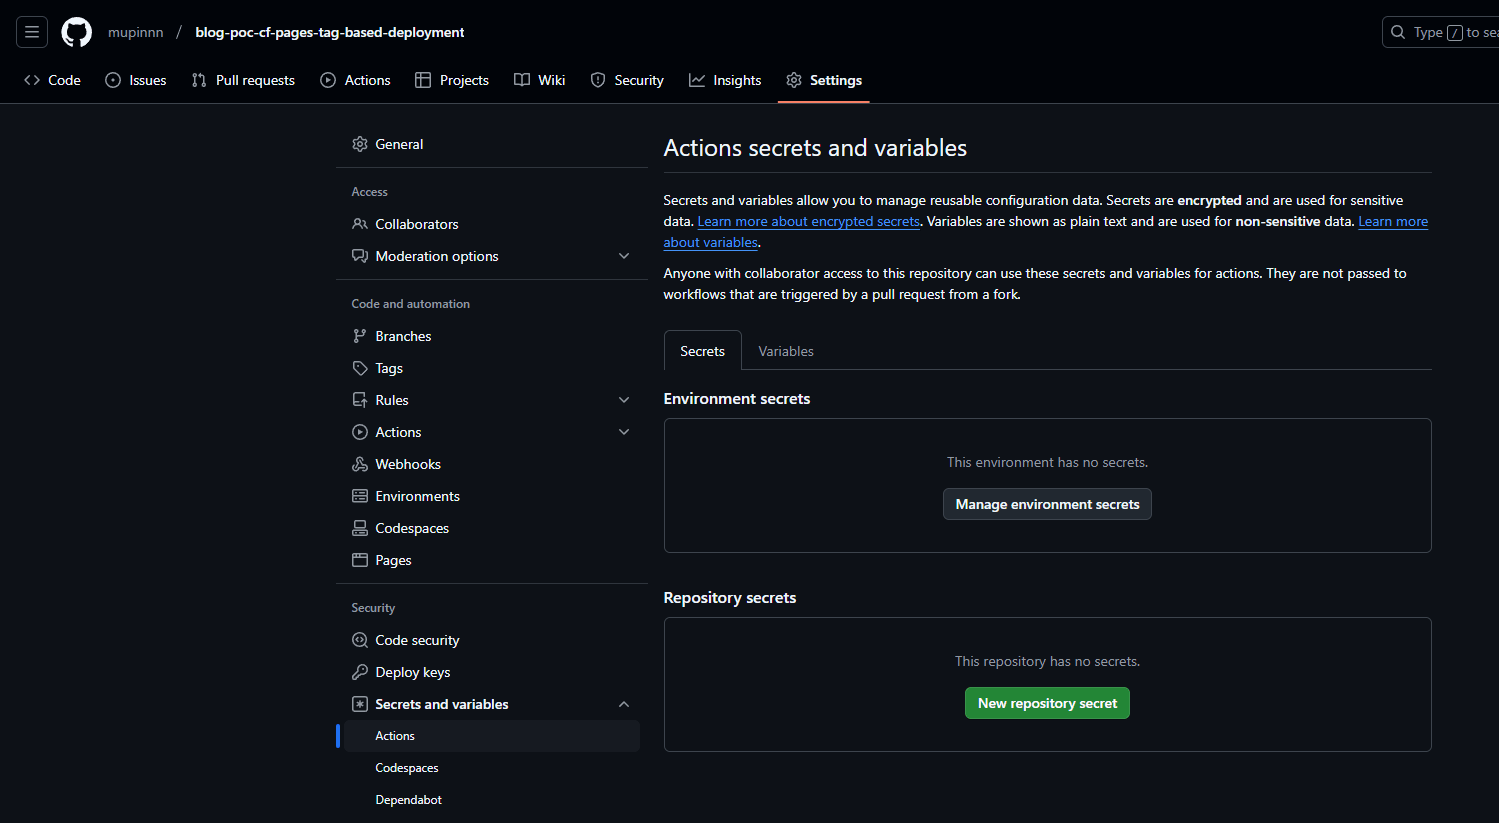
- Open the repository page that we have created
- Click “Settings” > “Secrets and variables” > “Actions”
- Click “New repository secret”
- Fill in the name column with
CLOUDFLARE_API_TOKEN - Fill in the value column with the API Token that we have created, then click “Add secret”
- Repeat from step three with the name and value for
CLOUDFLARE_ACCOUNT_ID
The secrets that we have created can be accessed from the workflow using secrets.<name>. For secrets.GITHUB_TOKEN is
automatically provided by GitHub using a certain permission.
Next, pay attention to the command argument in the “Deploy to Cloudflare Pages” step. The
cloudflare/wrangler-action@v3 action allows us to override the default command as needed.
There are several arguments that I use here so that this deployment runs as desired:
--project-name- The name of the project you want to deploy. Adjust it to the repository name or the one listed on the “Workers & Pages” dashboard.
--branch- The name of the branch you want to deploy. As you can see, in this branch argument I use a ternary condition with
the
IS_PRODUCTIONenvironment variables; iftruethen the branch that will be deployed isproductionand iffalse, then themainbranch will be deployed.
- The name of the branch you want to deploy. As you can see, in this branch argument I use a ternary condition with
the
command: |
	pages deploy dist --project-name=kaget --branch=${{ env.IS_PRODUCTION == 'true' && 'production' || 'main' }}
Our workflow is complete. Time to prove it!
First deployment
Sebelum kita commit dan push worklfow yang sudah dibuat, ada satu hal yang perlu kita pastikan—yaitu membuat proyek baru di dashboard Cloudflare Pages.
Before we commit and push the workflow that has been created, there is one thing we need to make sure of—that is, create a new project in the Cloudflare Pages dashboard.
- Open the Cloudflare dashboard
- In the upper right corner, find and click “+ Add” then click “Pages”. Later, the “Workers & Pages” menu will appear in the sidebar menu on the left

- Click “Create” > Select the “Pages” tab > Select the direct upload option
- Fill in the project name column according to the repository name or according to what we sent in the
--project-nameargument from the Wrangler CLI earlier - Then click “Create project”
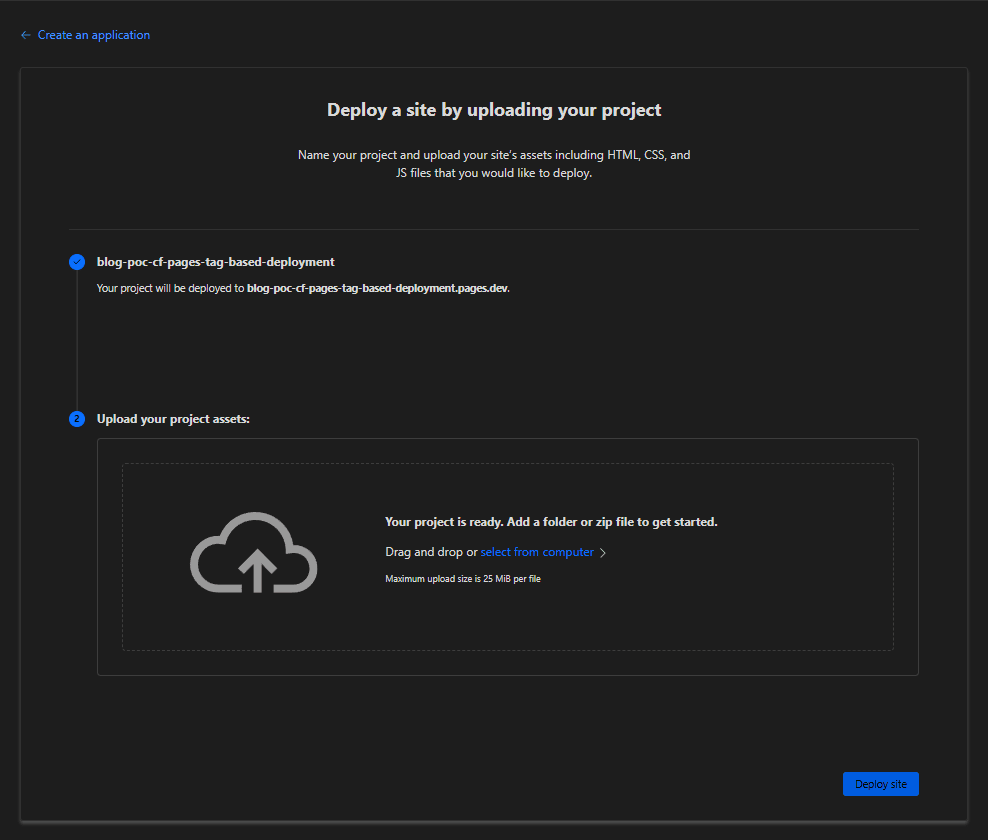
- Go back to the “Workers & Pages” page. There is no need to upload any assets as we will upload them via GitHub Actions
Once al the settings are done, it’s time to commit and push our workflow file.
$ git add .
$ git commit -m "chore: setup workflows"
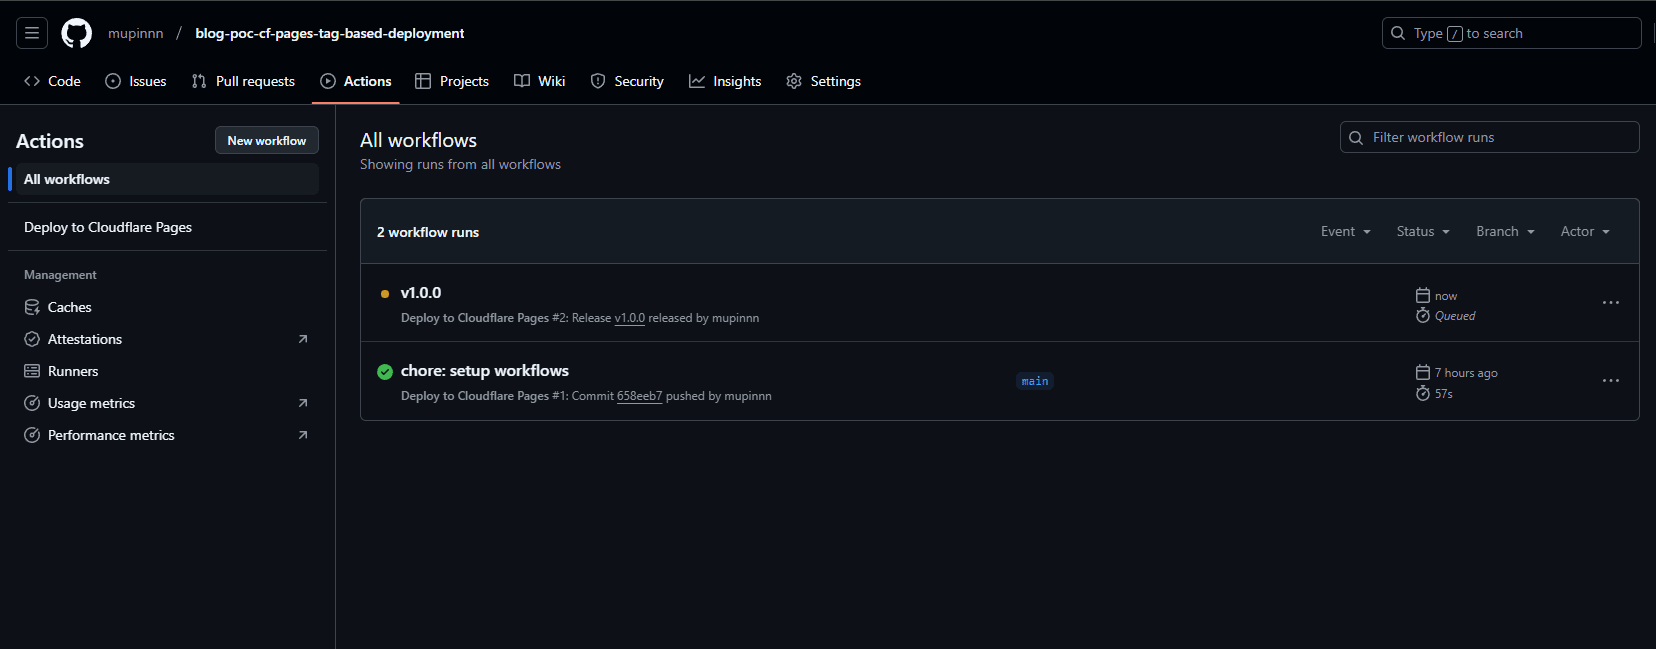
$ git pushGo to our repository page, click on “Actions” and you will see that there is a workflow running. You can click on it to see the details, even the details of each job and step that is running.


Take a look at the last image and notice the deployment URL—that’s right, there’s some sort of unique hash there. Let’s take a look at the “Workers & Pages” dashboard and see the project details.


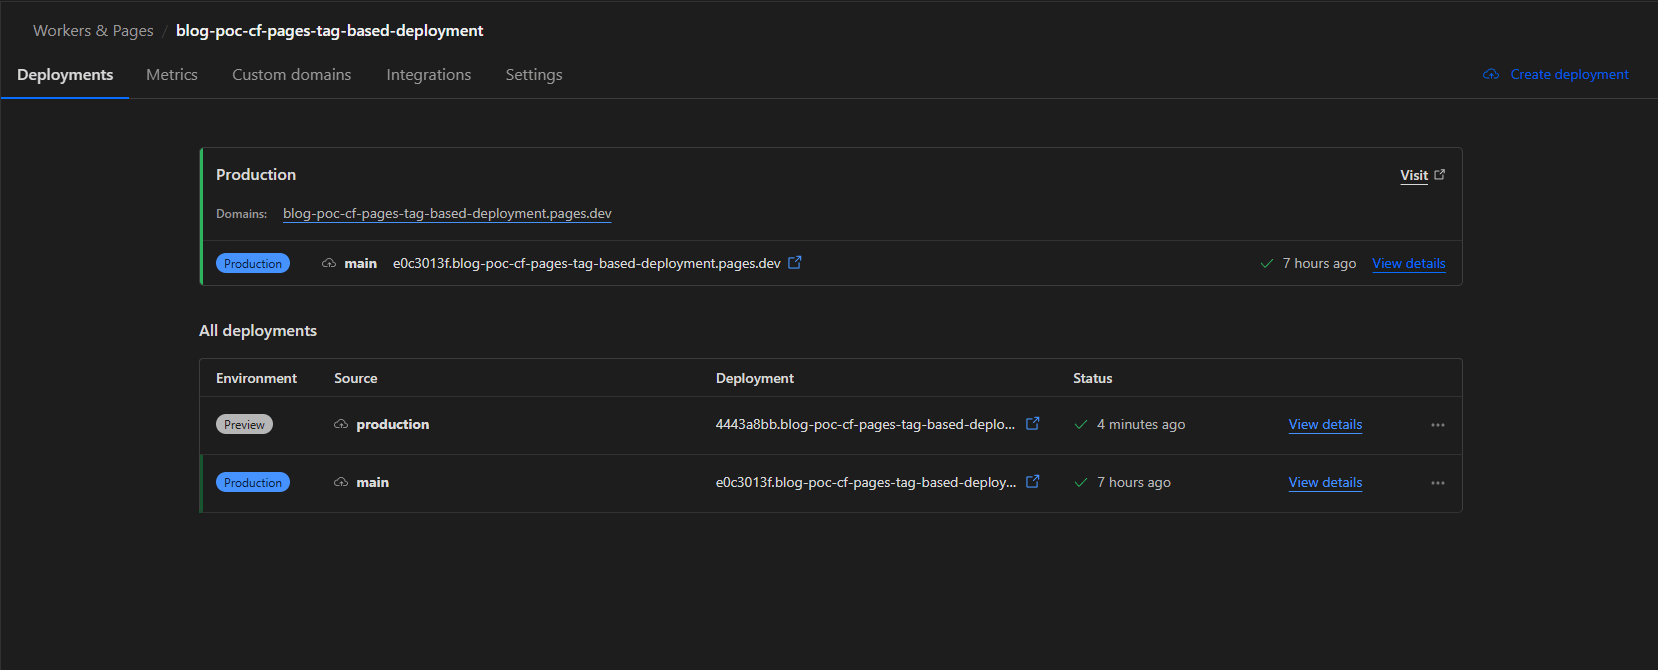
We got two URLs! One main URL https://blog-poc-cf-pages-tag-based-deployment.pages.dev/ and the second one with a unique hash for each commit **https://e0c3013f.blog-poc-cf-pages-tag-based-deployment.pages.dev/. If there is a new deployment, then it can be accessed via the main URL and the URL with the latest hash. Then, can we still access the previous deployment? Of course! With the note, it can only be accessed via the associated URL.
Please note, that the main URL will be assigned by Cloudflare Pages to the main branch (main/ master) and is
considered as a production deployment.
Deployment to production
We will use GitHub Releases to create a tag and record what changes have occurred in this production release.
First, go to our repository page and look on the right side for the “Releases” section. Click “Create a new release”.

Then, create a new tag in the “Choose a tag” field. We will create a v1.0.0 tag as the initial version.

Then, click “Generate release notes”. This will automatically create release notes based on the commit history of the successfully merged pull requests. For now, since there are no pull requests that have been merged, the release notes appear empty.
Next, click “Publish release” and see there will be a workflow running!

Take a look at the deploy job on the “Deploy to Cloudflare Pages” step. We have successfully set the deployment
based on the tag from GitHub Releases, so the --branch argument should contain production.

To make sure whether the previous deployment is really considered as production by Cloudflare Pages, we need to see it in our project’s “Workers & Pages” dashboard.
We can see the image below. Actually, we don’t have a production branch, but the --branch argument allows us to
distinguish a deployment by only having one branch.
Another odd thing is that our production branch is still considered a preview deployment by Cloudflare Pages; that is,
our main URL (https://blog-poc-cf-pages-tag-based-deployment.pages.dev/) still has the old content because it still
points to the previous deployment. Of course, this is not following our goals. We want deployment to production only
when there is a new tag. Any changes that are pushed to the main branch, if they are not ready for release, will not
available on the main URL—only on the preview URL.
Set the production branch as a production environment
Unfortunately, if we use the direct upload method to deploy our project to Cloudflare Pages, there is no way to set the branch used for the production environment from the dashboard. We have to do it through the API endpoint provided by Cloudflare.
Run the following command in your terminal. Don’t forget to prepare your API Token, Account ID, and project name.
curl --request PATCH \
"https://api.cloudflare.com/client/v4/accounts/{account_id}/pages/projects/{project_name}" \
--header "Authorization: Bearer <API_TOKEN>" \
--header "Content-Type: application/json" \
--data "{\"production_branch\": \"production\"}"
After success, we need to do another deployment to apply the changes. Run the workflow manually by selecting the
production option as the target environment.


Then, check your “Workers & Pages” dashboard and our production environment is on the right track. Maybe, it feels
like there is no difference between production and preview for now. You can try to make changes to your project. In my
experiment, I changed the title on the home page in the src/pages/index.astro file and then pushed the changes to the
main branch. This is where the difference will appear. My main URL
(https://blog-poc-cf-pages-tag-based-deployment.pages.dev/) has no changes, while if you access the preview deployment
from the main branch, you can see a difference in the title
(https://main.blog-poc-cf-pages-tag-based-deployment.pages.dev/).
💡 In addition to the unique hash, the deployment preview can also be accessed via the branch name such as
<branch>.<project>.pages.dev. This URL is an alias for the latest deployment on the branch.
Conclusion
Cloudflare Pages and its ecosystem can be considered a very promising alternative. We never know when we can get unlimited bandwidth for the site we created. In addition, integration with the Git provider also makes it very easy and can be said to be quite competitive with similar platforms.
Maybe some of you will think “Why on earth is a front-end developer tinkering with CI/CD? That’s the job of DevOps”—trust me, CI/CD is a general concept that every developer needs to understand; at least knowing what is needed to make a project ready for production—starting from lint, test, build, and which files are used.
Understanding CI/CD is also useful for hobby projects because we work alone—like what I’m doing right now.
Thank you!